Building a Bluetooth status widget with Xamarin
I have an LGE Nexus 5, and it’s a really great phone. But there’s some aspects of its usability that feel unfinished. For instance, the UI/UIX designers decided that enabling or disabling things like the wi-fi or bluetooth wasn’t difficult enough. So they turned it into a process: ‘using-two-fingers-swipe-down-and-tap-whatever-then-wait-then-tap-‘on’/’off’-to-enable/disable-then-tap-‘back’-twice’. Bluetooth, wi-fi, NFC, location… all the same.
It’s stupid. And bloody difficult if you’re trying to do it with just one hand. Didn’t they dog-food it before shipping?
Yeah, I know. First-world problems, right? Probably. But that’s not the point. An effective user interface gets out of the way, not into it. My point is that turning it on or off should be a simple toggle. If it’s off, a single tap should turn it on. And vice versa. Samsung (and others) have it right: their phones have a simple single-digit ‘swipe-down-and-tap’ operation. You can do it with just your thumb. And that’s way less stupid.
After dropping my phone for the umptieth time, I decided I’d make a widget to act as a switch to enable/disable the bluetooth, to prove the concept. One that I can use just a finger or thumb on. After a quick look in the app store (there’s about a squillion bluetooth widgets), I figured I’d just build my own. There’s a serious shortage of Xamarin widget examples too, as it turns out. The only half decent one I could find was that ‘word of the day’ one, which just gave me HTTP ‘403’ errors…
So, I figured I would blog about making it, too, as a simple Xamarin widget tutorial, and maybe save someone else a bit of time and effort.
Building a simple Android widget is surprisingly easy to do. Though building all the functionality and documenting it in a single blog post turned out to be a little ambitious, especially as I prefer to go into a bit more detail about some of the less obvious bits.
So I’ve decided to break it up. To get the proof-of-concept up and running, I’ve started off with a ‘react-only’ widget, which simply responds to changes in Bluetooth state, and that’s what this article is about.
UPDATE: The second part of this tutorial, detailing how to manage and monitor the device’s connectivity is over here.

Creating a Widget: Basic Steps
I used both Xamarin Studio and Visual Studio with the Xamarin.Android add-in to build this widget, but at this level there’s no real reason to use instead of the other. This example will use Xamarin Studio, simply because everyone who’s using Xamarin has that installed.
The sample project for this article is up on GitHub.
Create an empty Xamarin ‘Android application’ project. I called mine “BluetoothWidget”. (Don’t create a Xamarin.Forms app, this is not the same thing.)

Right click on the project to access the Android application properties, and make sure you select the permissions for BLUETOOTH and BLUETOOTH_ADMIN. If you don’t do this, nothing will happen when the bluetooth state changes. You won’t get any errors, but nothing will work, and it may leave you scratching your head. Ask me how I know…

Delete the standard MainActivity.cs class file it creates, you won’t need it. Now add a new, empty class, to replace MainActivity.cs. I called mine BTWidget, because I’m not very imaginative, and naming things is hard.
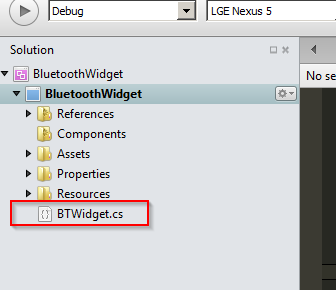
Make sure the new BTWidget class inherits from Android.Appwidget.AppWidgetProvider. You can also remove the default constructor, you won’t need that either.
You should end up with an empty class that looks like:
using System;
using Android.Appwidget;

namespace BluetoothWidget
{
  public class BTWidget : AppWidgetProvider
  {

  }
}
When the OS installs the widget and sets it up for you, it needs to know some initial default sizes, layout info, have a preview icon, etc. You’ll need to provide it with some metadata to do this. In this case it’s easiest to use an XML file to hold this information. So, add a new xml folder off the Resources folder, and create a new XML file in it called bt_widget.xml.
This file contains the initial specs for the widget, and a pointer to the rest of the layout:
<?xml version="1.0" encoding="utf-8"?>
<appwidget-provider xmlns:android="http://schemas.android.com/apk/res/android"
    android:minWidth="36dip"
    android:minHeight="36dip"
    android:maxWidth="80dip"
    android:maxHeight="80dip"
    android:updatePeriodMillis="0"
    android:previewImage="@drawable/icon"
    android:initialLayout="@layout/initial_layout">
</appwidget-provider>
Let’s unpack that quickly:
android:minWidth/Heightandandroid:maxWidth/Heightgive the host container for the Android widget a hint as to how small/large the widget should be allowed to shrink/grow. In most cases, these can be overridden by the home screen manager you’re placing them on anyway, but it gives it a predefined starting point.- We use
dipor ‘density independent pixels’ so that we’re not locking the widget size down to an absolute; it allows the device to pick the scaling, size and aspect ratio of the pixels used to render the widget. It just looks better.
- We use
android:updatePeriodMillistells the OS how long it should wait between sending notifications to the widget to tell it to update itself. Our widget is pretty dumb. It’s just reacting to events broadcast by the Bluetooth adapter’s state changes, so there’s no schedule. Hence0.android:previewImageis used to indicate to the user, when adding the widget, what the widget would normally look like. In this case we’ve just used the same icon as we’ve used for the widget application.android:initialLayoutis just a pointer to theinitial_layout.axmlfile which is off theResources\layoutfolder. You can use a regular.xmlfile too, but some IDEs won’t give you the ‘intellisense’ completion you may be expecting. Using an.axmlfile also lets you load it up in the layout designer, if you’re that way inclined. We’ll come back to this guy in a moment…
You can tell the compiler where to find the widget metadata by either putting a [MetaData] attribute on the class, or editing the AndroidManifest.xml file directly. Personally I prefer doing it through code; there’s less of a disconnect, and you spend less time jumping around between files to modify the same thing. It’s also, in my opinion, less prone to error, since the compiler can then build the XML for you.
Add the [MetaData] attribute, with a string property of "android.appwidget.provider". This will create a key in the AndroidManifest.xml file, which the OS (or widget host) can use to load the rest of the widget’s metadata. What metadata? Well, you need to point to it, and you do so by adding another property string called Resource, set to the URI of the bt_widget.xml file you created earlier. It should look like Resource = "@xml/bt_widget". And since that file points to the rest of the widget’s initial layout, it can be bootstrapped from there.
Personally I think this is an awful lot of effort to go to, with way too many levels of indirection and abstraction, but the compiler will take care of most of this if you set that [MetaData] attribute up properly.
You should end up with this:
using System;
using Android.Appwidget;

namespace BluetoothWidget
{
  [MetaData("android.appwidget.provider", Resource = "@xml/bt_widget")]
  public class BTWidget : AppWidgetProvider
  {
  }
}
The widget layout
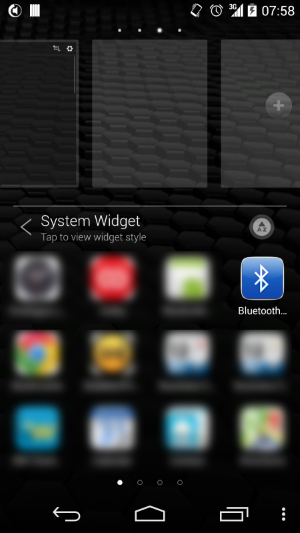
I said we’d come back to the android:initialLayout="@layout/initial_layout" attribute. This just points at another xml file (actually an .axml) file in this case, which defines how the widget will be laid out on screen. It’s nothing fancy. As you saw in the screenshot at the beginning of this article, our widget just looks like a 1x1 Bluetooth icon, sitting on the desktop. Basically all we’ve done is stuck a picture of the standard Bluetooth symbol on an ImageButton. I picked an ImageButton because it’ll allow me to add a click event handler at some point, which will make it more useful. I wrapped it in a LinearLayout because we have to put it in some sort of layout to keep the compiler and renderer happy.
Create a new xml file called initial_layout.axml in the Resources\layout folder, and paste in the code below:
<?xml version="1.0" encoding="utf-8"?>
<LinearLayout xmlns:android="http://schemas.android.com/apk/res/android"
  android:id="@+id/widget"
  android:layout_width="match_parent"
  android:layout_height="wrap_content"
  android:orientation="vertical">

  <!-- ImageButton creates a View which we can place an image on,
  and gives us access to a click-handler too -->
  <ImageButton
    android:id="@+id/imgBluetooth"
    android:layout_width="match_parent"
    android:layout_height="wrap_content"
    android:layout_gravity="center"
    android:src="@drawable/bluetooth_off"
    style="@style/WidgetBackground"
  />
</LinearLayout>
Like I said, nothing fancy.
The only part that might be of interest is the style attribute on the ImageButton. This points to a styles.xml file off the Resources\values folder (again, you’ll need to create this file yourself), and sets the background colour of the widget to transparent. If you don’t do this, it may look a little clunky because it doesn’t blend in properly.
Create a file called styles.xml in the Resources\values folder, and paste in the small chunk of XML below:
<?xml version="1.0" encoding="utf-8"?>
<resources>
  <style name="WidgetBackground">
    <item name="android:background">@android:color/transparent</item>
  </style>
</resources>
At this point, your solution should look something like this (ignore those drawable- folders for the moment):
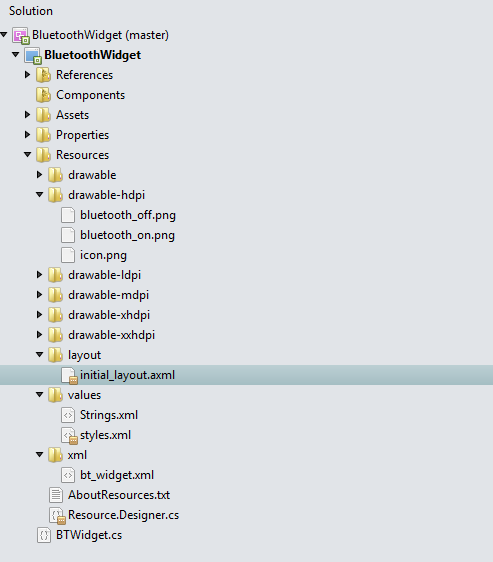
Icons and ‘Drawables’
OK, so you noticed those drawable-related folders. These aren’t created by default, I had to add them manually.
The dpi suffixes allow the compiler and renderer to build and select the correct resolution of icons and images to use for the best display, depending on the device they’re running on. The suffixes are convention based, so referencing @drawable/bluetooth_off on a high-DPI device would load the bluetooth_off.png file from the drawable-hdpi folder. Referencing that same resource on a low-DPI device would go looking for, and load, a file with the same name from the drawable-ldpi folder. And so on.
The Android subsystem knows the resolution level of the device it’s running on, so it’ll be able to automatically select the correct one (assuming you’ve provided it with one). It’ll fall back automatically if you didn’t, until it ends up in the Resources\drawable folder.
For the purposes of this widget, I used a freeware, non-commercial Bluetooth symbol image created by IconFactory, which I downloaded from FindIcons. Because it’s ‘freeware, non-commercial’, you cannot use it in a commercial product (which this isn’t, so we should be fine). So do not copy these and use them for your own commercial purposes without paying for them.
This symbol is 128x128 pixels, which is bigger than most of the -dpi settings I needed, but that’s nothing that Paint.Net couldn’t fix. I also needed an ‘off’ or ‘disabled’ version of the image, so I copied the original png file, and cranked the saturation down to 0, which effectively turned the background from blue to grey.
I ended up with two images:
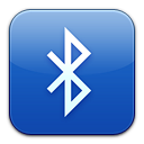
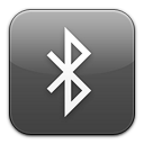
I resized the images from the original 128x128 pixels to
- 36x36 (ldpi),
- 48x48 (mdpi),
- 72x72 (hdpi),
- 96x96 (xhdpi), and
- 144x144 (xxhdpi)
(This last was obviously an up-size, but since the increase is negligible, it shouldn’t look too clunky on xxhdpi screens. This is just an example anyway.)
I then made dpi-related folders for each of them, and copied them in, adding them to the project as I went.
Finally I copied the bluetooth_on.png version of each one to an icon.png, in the same folder, so that there would be an appropriately named (and sized) @drawable/icon for each screen resolution.
Capturing messages about bluetooth state changes
Every time the bluetooth adapter state changes, the Android OS sends a notification message (‘intent’) to anyone who’s interested. Intents will often carry a payload, containing more information about what actually happened.
In order to let the OS know you’re interested in receiving these messages, you need to let it know you want to receive broadcasts of intents. You do this, by marking the class with a [BroadcastReceiver] attribute. This sets it up to receive ALL intents (there are thousands of different types), most of which you’ll neither want to know (nor care) about. We’ll see how to filter for just the ones we want, in a moment.
You should now have something like:
using System;
using Android.Appwidget;

namespace BluetoothWidget
{
  [BroadcastReceiver(Label = "Bluetooth Widget")]
  [MetaData("android.appwidget.provider", Resource = "@xml/bt_widget")]
  public class BTWidget : AppWidgetProvider
  {

  }
}
Hooking all the bits up
Now that we’ve added all the bits related to displaying the widget (and gained some small appreciation for how much work must really go into an actual graphically intensive Android application), it’s time to hook them up to some code.
First, we need to add an Intent Filter to the class. This will allow it to register itself with the OS as a filter for catching and processing specific kinds of Android intents.
For the purposes of this example, we’re interested in intercepting two kinds of Android intents: "android.appwidget.action.APPWIDGET_UPDATE" (which the system would be sending to our widget to tell it to update itself, for example when it’s first installed, or on a schedule). The other is the Bluetooth state-change notification intent (Bluetooth.Adapter.ActionStateChanged), which carries two integer values as a payload: one to say what the previous state was, and what state it’s in now. These integer values will resolve to Android.Bluetooth.State enum values.
So add the IntentFilter attribute, with a string array containing the two intents as follows (the order in which you list them doesn’t matter):
[BroadcastReceiver(Label = "Bluetooth Widget")]
[MetaData("android.appwidget.provider", Resource = "@xml/bt_widget")]
[IntentFilter(new string[] { "android.appwidget.action.APPWIDGET_UPDATE", Android.Bluetooth.BluetoothAdapter.ActionStateChanged })]
public class BTWidget : AppWidgetProvider
Now that Android knows it needs to send us these intents, we need to actually do something with them when they arrive. This is done by
- Overriding the
OnReceivemethod. This will fire for every intent you’re filtering for, when it arrives (and they can arrive en masse and quickly!), - Grabbing the intent you’re interested in, and
- Processing it and any payload it’s carrying, to do what you need to do.
So, add an override for OnReceive (this was provided by the AppWidgetProvider you originally inherited the class from):
public override void OnReceive(Context context, Intent intent)
{
  if (intent.Action == Android.Bluetooth.BluetoothAdapter.ActionStateChanged)
  {
    Log.Info(APP_NAME, "Received BT Action State change message");
    ProcessBTStateChangeMessage(context, intent);
  }
}
context is basically “this application”, which we’re not really worried about. But we do care about that intent, which could be one of either APPWIDGET_UPDATE or ActionStateChanged. So we grab it, see if it’s one that we want, and if so, we hand it off to a custom method to process it.
The custom method really only consists of:
- looking at the payload,
- reading the previous state and new state (e.g. maybe it went from
Android.Bluetooth.State.OfftoAndroid.Bluetooth.State.TurningOn)- we don’t even really need the previous state, but I’ve included it here for demo purposes.
- changing the UI of the widget to indicate the new state.
Android has some fairly strict protocols to kill applications that take too long to do things. So make sure you get in, get your stuff done, and get out again as quickly as you can. Otherwise you may end up with an “Application Not Responding” (ANR) message, which is one of the fastest ways to get your widget uninstalled, especially if it does it a lot. If something is going to take a while (> ~5 seconds), you’re better handing it off to something async, or Task or a Service, so it doesn’t lock everything up.
The custom method is below (you might want to put in some logging for debugging/info purposes, I’ve left it out for the sake of brevity, though I’ve added some comments for clarity):
private void ProcessBTStateChangeMessage(Context context, Intent intent)
{
  // we don't use prevState, this is just for example purposes
  int prevState = intent.GetIntExtra(BluetoothAdapter.ExtraPreviousState, -1);
  int newState = intent.GetIntExtra(BluetoothAdapter.ExtraState, -1);

  // get the running instance of the current app widget manager
  var appWidgetManager = AppWidgetManager.GetInstance(context);

  // get the list of all currently running Views based on the type of 'this' app,
  // which are Views of type Resource.Layout.initial_layout.
  // Remember, there may be more than one instance of your widget running.
  var remoteViews = new RemoteViews(context.PackageName, Resource.Layout.initial_layout);

  // get this _specific_ widget
  var thisWidget = new ComponentName(context, this.Class);

  // allocate a variable to hold an image resource ID, and set it to the default 'off' image.
  int imgResource = Resource.Drawable.bluetooth_off;

  // set that imgResource variable based on the new state. If the new state cannot be
  // matched, it'll default to the 'off' version (as above)
  switch((Android.Bluetooth.State)newState)
  {
    case Android.Bluetooth.State.Off:
    case Android.Bluetooth.State.TurningOn:
      {
      imgResource = Resource.Drawable.bluetooth_off;
      break;
    }

    case Android.Bluetooth.State.On:
    case Android.Bluetooth.State.TurningOff:
      {
      imgResource = Resource.Drawable.bluetooth_on;
      break;
    }

    default:
    {
      imgResource = Resource.Drawable.bluetooth_off;
      break;
    }

  }

  // set the image on the ImageButton to the chosen image resource ID
  remoteViews.SetImageViewResource(Resource.Id.imgBluetooth, imgResource);

  // force an update (which in our case is just a redraw)
  appWidgetManager.UpdateAppWidget(thisWidget, remoteViews);
}
And that’s basically it. We’re done.
Or are we?
Widget startup
As it stands, this widget works quite well to report on bluetooth adapter state changes. With “changes” being the operative word. When you initially install the widget, it’s highly unlikely that the bluetooth state will be changing just as you do so. So it’s also likely that the initial “off” status that the widget is installed with will be wrong if your bluetooth is switched on at the time.
There’s one last thing we need to do: We need to react to the android.appwidget.action.APPWIDGET_UPDATE intent that is broadcast to our widget(s) when they’re initially installed, and use that as a trigger to check the bluetooth adapter state. We can then use the same code to set the widget’s initial display to match.
Modify the OnReceive method to also react to the APPWIDGET_UPDATE intent:
public override void OnReceive(Context context, Intent intent)
{
  Log.Info(APP_NAME, "OnReceive received intent: {0}", intent.Action);

  if(intent.Action == "android.appwidget.action.APPWIDGET_UPDATE")
  {
    Log.Info(APP_NAME, "Received AppWidget Update");
    var currentState = Android.Bluetooth.BluetoothAdapter.DefaultAdapter.State;
    Log.Info(APP_NAME, "BT adapter state currently {0}", currentState);
    UpdateWidgetDisplay(context, (int)currentState);
    return;
  }

  if(intent.Action == Android.Bluetooth.BluetoothAdapter.ActionStateChanged)
  {
    Log.Info(APP_NAME, "Received BT Action State change message");
    ProcessBTStateChangeMessage(context, intent);
    return;
  }
}
…and we can refactor out the common code to to an UpdateWidgetDisplay method (and shorten ProcessBTStateChangeMessage accordingly):
private void UpdateWidgetDisplay(Context context, int newState)
{
  var appWidgetManager = AppWidgetManager.GetInstance(context);
  var remoteViews = new RemoteViews(context.PackageName, Resource.Layout.initial_layout);
  Log.Debug(APP_NAME, "this.GetType().ToString(): {0}", this.GetType().ToString());

  var thisWidget = new ComponentName(context, this.Class);
  Log.Debug(APP_NAME, thisWidget.FlattenToString());
  Log.Debug(APP_NAME, "remoteViews: {0}", remoteViews.ToString());

  int imgResource = Resource.Drawable.bluetooth_off;
  switch((Android.Bluetooth.State)newState)
  {
    case Android.Bluetooth.State.Off:
    case Android.Bluetooth.State.TurningOn:
      {
        imgResource = Resource.Drawable.bluetooth_off;
        break;
      }

    case Android.Bluetooth.State.On:
    case Android.Bluetooth.State.TurningOff:
      {
        imgResource = Resource.Drawable.bluetooth_on;
        break;
      }

    default:
      {
        imgResource = Resource.Drawable.bluetooth_off;
        break;
      }
  }

  remoteViews.SetImageViewResource(Resource.Id.imgBluetooth, imgResource);
  appWidgetManager.UpdateAppWidget(thisWidget, remoteViews);
}
…and the new ProcessBTStateChangeMessage now looks like:
private void ProcessBTStateChangeMessage(Context context, Intent intent)
{
  int prevState = intent.GetIntExtra(BluetoothAdapter.ExtraPreviousState, -1);
  int newState = intent.GetIntExtra(BluetoothAdapter.ExtraState, -1);
  string message = string.Format("Bluetooth State Change from {0} to {1}", prevState, newState);
  Log.Info(APP_NAME, message);

  UpdateWidgetDisplay(context, newState);
}
Now we’re done.
| You should now be able to build and deploy the widget to your device. In Xamarin Studio this is done by selecting “Run | Upload to device” from the main menu. In Visual Studio, it’s done by selecting “Build | Deploy Solution” or “Build | Deploy BluetoothWidget” from the main menu. |
Once the project is built and has been deployed successfully, you can then install it (usually) by long-pressing on a home screen, selecting the option to add a widget, and picking it from the list. You may have to manually remove it between upgrades and fixes as well, as the (re)deployment procedure doesn’t always remove it from the screen.
Once it’s installed, turn your bluetooth on and off to see the state change from grey to blue (or vice versa). It’s not instantaneous; it may take a second or two for your bluetooth adapter to power up and down.
Note that you can’t “run” a widget, which makes it more difficult to debug. The best you can do with this particular one is to add some logging, if things are misbehaving, to try and figure out what’s wrong.
Some notes
As I mentioned, there’s no easy way to actually debug widgets, short of adding lots of logging. So keep them dumb. That way there’s fewer places for things to break.
Remember that the widget may trigger an ANR if it takes too long to do something. In our case all it’s doing is swapping out an image that’s been embedded as a resource, so that’s not a big deal. But if it had to load that image off the net, or do some heavy calculations, that might be enough to break it. Any complex code should go into an external service (which you can also debug if necessary, by hooking it up to a separate application).
This widget, as it stands, is obviously a little contrived. But it does serve to provide an intro to building widgets with Xamarin. In a future blog post, I’ll add some more functionality to it, to get it to tell us if we’re connected to something (and maybe even what it’s connected to). And I’ll also solve the problem of allowing us to enable and disable the bluetooth by tapping on the widget.
In my follow-up, I’ll show you how to enable and disable the Bluetooth adapter by tapping on the widget, as well as monitoring its connectivity state.
Where’s the source code?
The source code is up on GitHub. Go ahead and clone it, or fork it, or use the ‘Download ZIP’ button on the right hand side of that page top get your own copy. Have a look, load it up, and experiment with it. You’ll learn far more from actually fiddling with the code, breaking stuff, and deploying it than you ever will just scanning through the dead code. It’s open-source (of course) and I’ve published it under the MIT license, so you can do what you like with it (bearing in mind any restrictions on image copyrights).
Some additional resources
I found these pages and sites useful while I was researching this and other widgets I’ve built for personal use, and I am sure you will too. A number of them reference Java APIs and pure Android development, but the Xamarin guys have made sure to keep things (and the naming of things) close enough that you’ll easily be able to understand what’s going on. Feel free to ask questions (or offer corrections!) in the comments below. And, like I said, and this is a public OSS repo on GitHub so please feel free to fork it or improve it.
- Android Widget Basics: https://developer.android.com/guide/topics/appwidgets/index.html
- Android Bluetooth Basics: http://developer.android.com/guide/topics/connectivity/bluetooth.html (on/off states)
- Android Bluetooth Adapter class: http://developer.android.com/reference/android/bluetooth/BluetoothAdapter.html
- Android Widget Tutorial: http://www.tutorialspoint.com/android/android_widgets.htm
- Xamarin ‘Word of the day’ widget example: http://developer.xamarin.com/samples/SimpleWidget/ (doesn’t work out of the box, gave me a ‘403 forbidden’ error)
- Bluetooth Icon/Widget image: http://findicons.com/icon/131341/bluetooth_file_exchange?id=131341 (via http://iconfactory.com, it’s freeware, for non-commercial use only)
- StackOverflow - How do I identify and update ‘me’ (i.e. this widget)? http://stackoverflow.com/questions/4073907/update-android-widget-from-activity?rq=1